How to Apply Painter’s Tape Properly for Sharp Paint Lines
Getting sharp, clean paint lines is the dream of every homeowner. However, many people struggle with paint bleeding under the tape, leaving messy edges that ruin an otherwise great paint job. The good news is that proper technique makes all the difference. Once you learn how to apply painter’s tape the right way, your results will look professional every single time.
This guide walks you through each step of the process. Whether you are painting a single accent wall or refreshing every room in your home, these tips will help you get crisp, clean lines without the frustration.
Why Painter’s Tape Matters
Painter’s tape is not just a strip of blue or green adhesive. It is a precision tool. When used correctly, it creates a barrier that keeps paint exactly where you want it. When used incorrectly, it can peel off existing paint, leave sticky residue, or allow paint to seep underneath.
The right tape for the right surface matters a great deal. Standard blue painter’s tape works well on most smooth walls. However, for delicate surfaces like wallpaper or freshly painted walls, a low-adhesion tape is a better choice. For textured surfaces, you may need a tape designed to conform to uneven textures.
Therefore, before you even think about painting, take a moment to choose the correct tape for your specific surface. This one small decision can save you hours of touch-up work later.
What You Need Before You Start
Gather your supplies before you begin. Having everything within reach keeps the process smooth and efficient. Here is what you will need:
- Painter’s tape (choose the right type for your surface)
- A clean, dry cloth or sponge
- A plastic or metal putty knife or a credit card
- A sharp utility knife or scissors
- A step ladder if you are working near ceilings
- A small brush for applying sealant (optional but helpful)
- Clear acrylic sealant or a thin layer of base paint (for extra-sharp lines)
Additionally, make sure the surface you are taping is clean. Dust, grease, or moisture will prevent the tape from adhering properly. A quick wipe-down with a damp cloth followed by a dry cloth is usually enough to prepare most walls.
Step-by-Step Guide to Applying Painter’s Tape
Clean and Prepare the Surface
Start with a clean surface. Any dirt or dust on the wall will weaken the tape’s bond and allow paint to seep underneath. Wipe the area down and let it dry completely before applying any tape.
If the wall has a fresh coat of paint, wait at least 24 hours before taping. Applying tape too soon can pull up the fresh paint when you remove it later.
Measure and Plan Your Lines
Before you peel the tape, plan where it needs to go. Use a level and a pencil to lightly mark any straight lines that need to be perfectly horizontal or vertical. This step is especially important for geometric designs or two-tone walls.
Additionally, measure twice and tape once. Rushing this step leads to crooked lines that are hard to fix once paint is applied.
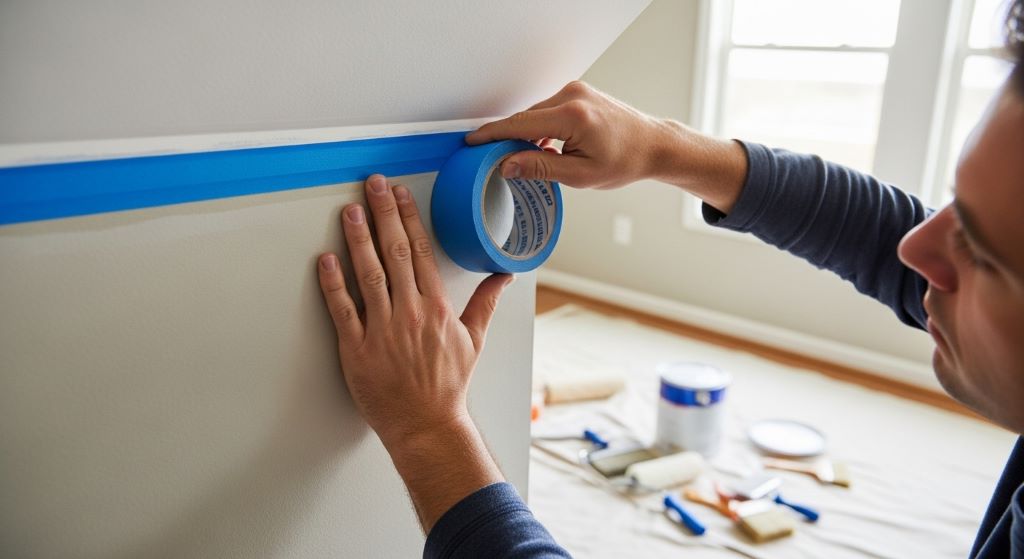
Apply the Tape in Short Sections
Do not try to run one long strip of tape across an entire wall in a single motion. Instead, apply the tape in sections of about 12 to 18 inches at a time. Press each section firmly as you go.
Start at a corner or an anchor point. Align the edge of the tape exactly where you want your paint line to be. Keep the tape taut but not stretched. Stretching the tape causes it to curl or lift at the edges once it relaxes.
Press the Edges Down Firmly
This is one of the most important steps in the entire process. After the tape is in place, use a putty knife, credit card, or your fingernail to press down the inner edge of the tape firmly. This edge is the one that will be touching the paint.
Run the flat tool along the tape edge with firm, even pressure. The goal is to eliminate any gaps or air pockets between the tape and the surface. Even a tiny gap can allow paint to seep underneath, which ruins the line.
Seal the Tape Edge (Optional but Highly Effective)
Here is one of the best-kept home painting hacks for achieving truly sharp lines. Before you apply your main paint color, brush a thin layer of the base wall color (or clear acrylic sealant) along the taped edge. Let it dry completely.
This layer seals any tiny gaps under the tape. When you later apply your main paint color, it has no way to bleed through. The result is an incredibly sharp, clean line every time. This technique is especially useful on textured walls or in high-humidity areas.
Apply Your Paint
Now you are ready to paint. Load your brush or roller with the appropriate amount of paint. When painting near the tape, always brush away from the tape edge rather than toward it. This motion pushes paint away from the line rather than forcing it underneath the tape.
Apply two thin coats rather than one thick coat. Thick coats are more likely to bleed under the tape and take longer to dry. Therefore, patience here leads to better results.
How to Remove Painter’s Tape Correctly
Removing the tape at the right time and in the right way is just as important as applying it. Many people make the mistake of waiting too long or pulling the tape in the wrong direction.
The Right Time to Remove
Remove the tape while the paint is still slightly wet, or wait until it is fully dry. The worst time to remove it is when the paint is in that middle stage — tacky but not quite dry. At that point, the paint can peel or smear.
Many professional painters prefer to remove the tape while the paint is still wet. This allows the tape to pull away cleanly without tearing the dried paint edge. However, if you choose to wait until the paint is dry, the next step becomes even more important.
Score the Edge Before Pulling
If the paint has dried completely, use a sharp utility knife to score along the edge of the tape before removing it. Hold the knife at a low angle and draw it gently along the tape’s inner edge. This breaks the paint film and prevents it from tearing away with the tape.
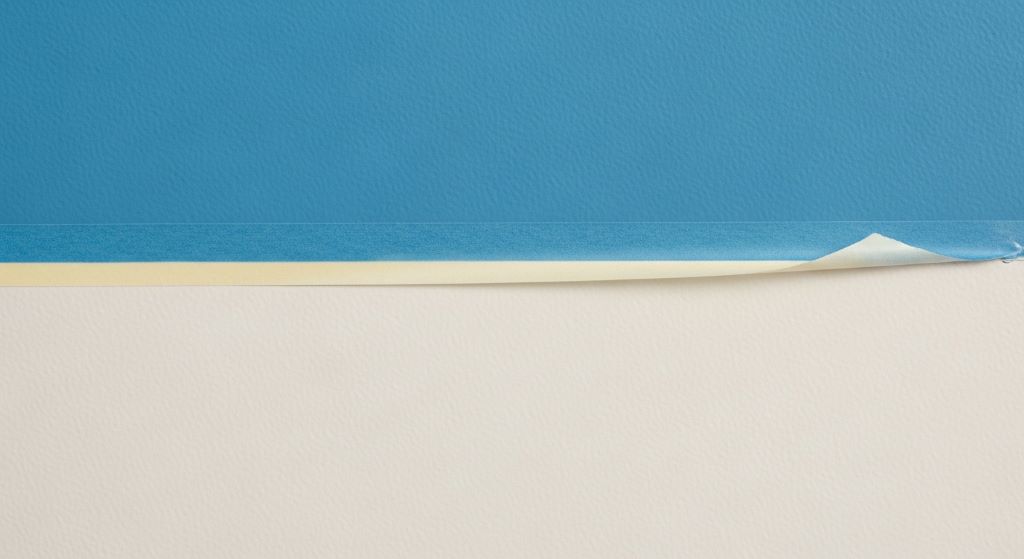
Pull at the Right Angle
Always pull the tape back at a 45-degree angle, not straight back. Pull slowly and steadily. Pulling too fast or at a sharp angle can damage the surface beneath.
Additionally, pull back over itself rather than away from the wall. This technique gives you far more control and reduces the risk of tearing.
Common Mistakes to Avoid
Even experienced painters make mistakes with tape. Knowing what to avoid can save you a lot of time and frustration.
Skipping surface preparation is one of the most common errors. Without a clean, dry surface, the tape will not bond properly. Paint will inevitably seep underneath.
Another frequent mistake is using the wrong tape. Not all painter’s tapes are the same. Using a tape that is too aggressive on a delicate wall can strip off existing paint when removed.
Leaving the tape on too long is also a problem. Most painter’s tapes are designed to be removed within a specific window — usually 14 to 60 days, depending on the brand. Leaving tape on beyond this time makes it much harder to remove and can leave sticky residue.
Finally, many people forget to press the tape edge down firmly. This one step, more than any other, determines whether you get a sharp line or a blurry one. Therefore, never skip it.
Tips for Specific Surfaces and Situations
Painting Near Trim and Baseboards
When taping near trim or baseboards, take extra care to align the tape precisely. Use a putty knife to tuck the tape edge into any gaps between the wall and the trim. This prevents paint from creeping into the gap and creating an uneven line.
Painting Textured Walls
Textured walls are the biggest challenge for tape. The uneven surface creates countless tiny gaps for paint to sneak through. For this reason, the sealant step described earlier is especially important on textured walls. You may also want to use a tape specifically designed for rough or textured surfaces.
Painting Geometric Patterns
Geometric designs and DIY wall painting projects that involve multiple colors require careful planning. Tape off one section at a time, allow each color to dry fully before taping the next section, and always score the dried paint edge before removing tape. This methodical approach is the key to crisp, professional-looking patterns.
Outdoor Painting
Outdoor conditions introduce additional challenges. Heat, direct sunlight, and wind can dry out the tape adhesive and reduce its effectiveness. Apply tape in the shade when possible, and remove it before the end of the day to prevent the adhesive from baking onto the surface.
Conclusion
Applying painter’s tape properly is a skill that anyone can master with a little practice and the right approach. The key steps are simple: prepare your surface, choose the right tape, apply it in short sections, press the edges firmly, seal the edge if needed, and remove the tape carefully at the right time.
These techniques apply whether you are working on a quick weekend refresh or a more involved home painting project. Additionally, avoiding common mistakes like using the wrong tape or skipping surface prep will save you significant time and effort.
The difference between a messy edge and a perfectly sharp paint line often comes down to just a few small steps. Therefore, take your time, follow the process, and enjoy results that look truly professional.
Frequently Asked Questions
How long should I leave painter’s tape on before removing it?
Most painter’s tapes should be removed within 14 to 60 days of application, depending on the brand. For the best results, remove the tape while the paint is still slightly wet or immediately after it has fully dried. Avoid removing it during the tacky, in-between stage.
Why does paint bleed under painter’s tape even when I press it down?
Paint bleeds under tape for several reasons. The surface may not have been clean or dry enough before taping. The tape edge may not have been pressed down firmly enough. On textured walls, gaps in the surface allow paint to pass through. Sealing the tape edge with a thin layer of base paint before applying the main color can eliminate this problem.
Can I reuse painter’s tape?
Painter’s tape is generally designed for single use. Reusing it reduces its adhesive strength, which means the edges will not seal properly. For the best results, always use a fresh piece of tape.
What is the difference between blue and green painter’s tape?
Blue painter’s tape is a standard option suitable for most smooth interior surfaces. Green painter’s tape is typically designed for more delicate surfaces or outdoor use. It often has a stronger adhesive and better resistance to moisture. Always check the packaging to ensure the tape is appropriate for your specific surface.
Do I need to use painter’s tape if I have a steady hand?
A steady hand can get you close, but painter’s tape provides a level of precision that freehand painting cannot match. It is especially useful near ceilings, trim, and any area where two colors meet. For most people, using tape consistently leads to cleaner, more professional-looking results.
Related Topics:
How to Paint Cherry Wood Furniture? Quick Tips
Variations of Blue Gray Paint Colors to Elevate Your Space


Post Comment