
How to Fix a Drafty Window: A DIY Guide
Hey there, DIY enthusiast! If you’ve ever experienced that annoying chilly breeze sneaking into your home through a drafty window, you know how frustrating it can be. It’s like trying to stay warm in a leaky boat. But fret not, because I’m here to guide you through the process of fixing a drafty window all on your own. No need to hire a pro – you’ve got this!
Step 1: Diagnose the Draft
Before we dive into the nitty-gritty of fixing your drafty window, let’s figure out where that pesky draft is coming from. To do this, follow these simple steps:
- Light the Way: On a windy day, grab a lit candle or a stick of incense. Slowly move it around the window frame and sash. Watch for any noticeable changes in the flame or the smoke trail. If it flickers or bends, you’ve found a draft.
- Feel the Draft: Run your hand along the window frame and sash, paying close attention to where you feel cold air seeping in.
- Listen Closely: Sometimes, drafts can be sneaky. Listen for any whistling or rattling sounds around the window. These are telltale signs of drafts.
Step 2: Gather Your Tools and Materials
Now that you’ve pinpointed the draft’s location, let’s get ready for action. Here’s what you’ll need:
- Caulk Gun and Caulk: To seal gaps and cracks in the window frame.
- Weatherstripping: To seal gaps around the sash and frame.
- Window Film: For an extra layer of insulation.
- Draft Stoppers: These can be in the form of foam strips or door sweeps to seal gaps under the window.
- Screwdriver and Screws: For any loose or rattling window panes.
Step 3: Seal the Deal with Caulk
Caulk is your best friend when it comes to sealing up those sneaky drafts. Here’s how to use it effectively:
- Clean the Area: Remove any old caulk or debris from the gap. A putty knife or scraper can be handy for this.
- Apply the Caulk: Load your caulk gun and carefully squeeze a bead of caulk into the gap. Don’t worry if it looks messy; you can smooth it out with a wet finger or a caulk tool. The goal is to create an airtight seal.
- Smooth It Out: Run your finger along the caulk to smooth it and ensure it adheres well.
- Let It Dry: Follow the drying time specified on the caulk’s label. Typically, it takes a few hours to cure completely.
- Inspect Your Work: Once it’s dry, give it a once-over. If you missed any spots or need to apply a second layer, go for it.
Step 4: Weatherstrip for Success
Weatherstripping is another essential tool in your DIY arsenal. It helps seal gaps around the sash and frame to keep that draft at bay:
- Measure and Cut: Start by measuring the length of the gap you need to seal. Cut the weatherstripping accordingly.
- Clean the Surface: Make sure the surface is clean and dry before applying the weatherstripping.
- Apply with Care: Peel off the backing and press the weatherstripping into place, making sure it adheres firmly.
- Test It Out: Open and close the window a few times to ensure the weatherstripping doesn’t interfere with its operation.
Step 5: Add an Extra Layer with Window Film
Window film is like putting a cozy blanket on your window. It provides an extra layer of insulation to keep drafts out and warmth in:
- Clean the Glass: Start by thoroughly cleaning the window glass to ensure the film adheres well.
- Measure and Cut: Measure the window dimensions and cut the film accordingly, leaving a little extra on each side.
- Apply the Film: Use double-sided tape or adhesive tabs to affix the film to the window frame. Then, use a hairdryer to gently shrink and tighten the film.
- Trim the Edges: Once it’s securely in place, trim any excess film for a neat finish.
Step 6: Tackle the Underdraft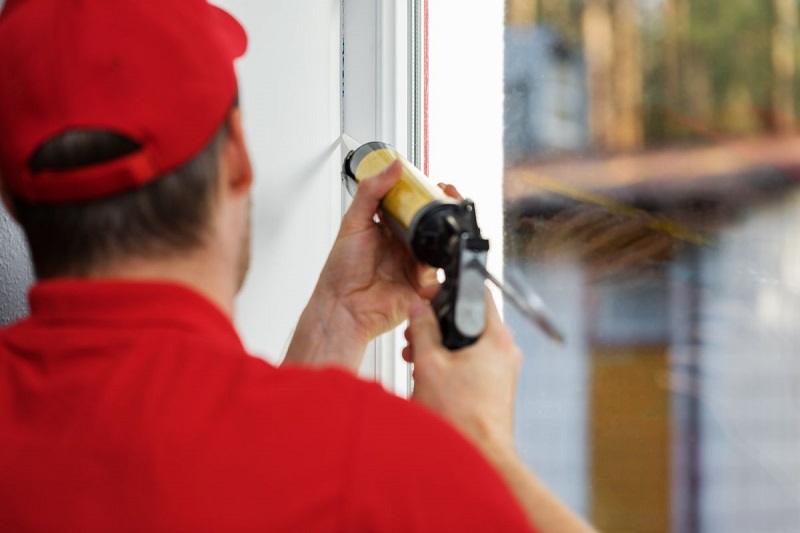
Don’t forget about the sneaky drafts that creep in from below your window. To seal these gaps, you can use draft stoppers:
- Pick Your Stopper: You can choose from foam strips or door sweeps, depending on the gap size.
- Measure and Cut: Measure the length of the gap under the window and cut the stopper to fit.
- Install the Stopper: Affix the stopper along the bottom of the window or door, making sure it forms a snug seal.
Step 7: Secure Loose Panes
Sometimes, drafts can sneak in through loose or rattling window panes. Here’s how to fix that:
- Tighten Screws: Use a screwdriver to tighten any loose screws holding the window panes in place.
- Replace Weatherstripping: If there’s worn-out or missing weatherstripping around the window pane, replace it.
Step 8: Final Inspection and Enjoyment
You’re almost there! Now, take a step back and admire your draft-free window. Open it, close it, and make sure everything works smoothly. Feel the temperature difference and revel in your DIY success.
FAQs (Frequently Asked Questions)
- Can I use caulk for both wooden and metal window frames?
Absolutely! Caulk works well for sealing gaps in both wooden and metal window frames. Just make sure you choose the appropriate type of caulk for the material you’re working with.
- Is it necessary to use window film if I’ve already sealed gaps with caulk and weatherstripping?
While it’s not mandatory, using window film can provide an extra layer of insulation, especially for single-pane windows. It’s a cost-effective way to enhance energy efficiency.
- How long does weatherstripping typically last before it needs replacement?
Weatherstripping can last anywhere from 5 to 15 years, depending on the quality and exposure to weather. If you notice it’s no longer sealing properly or shows signs of wear, it’s time to replace it.
- Are draft stoppers only useful for Windows?
No, draft stoppers can be used for doors as well. They are versatile and effective at sealing gaps to prevent drafts from entering your home.
- What should I do if I’m still experiencing drafts after following these steps?
If drafts persist, it may be a sign of more significant window issues, such as damaged or deteriorating frames. In such cases, it’s best to consult a professional for a thorough inspection and repair.


Post Comment